Showing posts with label Closed Up. Show all posts

red ants


Ants are social insects of the family Formicidae /fɔrˈmɪsɨdiː/ and, along with the related wasps and bees, belong to the order Hymenoptera. Ants evolved from wasp-like ancestors in the mid-Cretaceous period between 110 and 130 million years ago and diversified after the rise of flowering plants. More than 12,500 of an estimated total of 22,000 species have been classified. They are easily identified by their elbowed antennae and the distinctive node-like structure that forms their slender waists.

Ants form colonies that range in size from a few dozen predatory individuals living in small natural cavities to highly organised colonies that may occupy large territories and consist of millions of individuals. Larger colonies consist mostly of sterile, wingless females forming castes of "workers", "soldiers", or other specialised groups. Nearly all ant colonies also have some fertile males called "drones" and one or more fertile females called "queens". The colonies sometimes are described as superorganisms because the ants appear to operate as a unified entity, collectively working together to support the colony.

Ants have colonised almost every landmass on Earth. The only places lacking indigenous ants are Antarctica and a few remote or inhospitable islands. Ants thrive in most ecosystems and may form 15–25% of the terrestrial animal biomass. Their success in so many environments has been attributed to their social organisation and their ability to modify habitats, tap resources, and defend themselves. Their long co-evolution with other species has led to mimetic, commensal, parasitic, and mutualistic relationships.

Ant societies have division of labour, communication between individuals, and an ability to solve complex problems. These parallels with human societies have long been an inspiration and subject of study. Many human cultures make use of ants in cuisine, medication, and rituals. Some species are valued in their role as biological pest control agents. Their ability to exploit resources may bring ants into conflict with humans, however, as they can damage crops and invade buildings. Some species, such as the red imported fire ant (Solenopsis invicta), are regarded as invasive species, establishing themselves in areas where they have been introduced accidentally.

Macro Photography for Beginners

Closed up@macro Sony

Closed up@macro Sony

in macro photography you should aim to capture a sharp image of your tiny subject with all — or nearly all — of the subject in sharp focus. Using a macro lens on a DSLR is the optimum way to travel.

There is one more thing to be taken into account: you must keep the subject still and the camera must be locked off.

For macro shots you need a steady camera and subject, a small lens aperture and a slow shutter speed. Then you need more light to cope with the slower shutter speed.

Keep Your Distance

In macro shooting the optimum camera-to-subject distance is a long one. Place the camera too close to the subject and there’s a good chance you’ll throw a camera shadow onto it; at too close a distance you may distort the subject.

Using the macro mode on a compact or DSLR and wanting to capture a very, very close detail of your subject, it’s most likely you’ll move the lens to the widest angle/shortest focal length setting. This also presents the possibility of optical distortion.

Macro lenses for DSLRs are best chosen in the longer focal lengths: many lens makers market a 100mm macro — ideal for the task.

Canon and others make stabilised macro lenses. The idea is sound in principle: if you have to handhold the camera/lens combo while you snare close shots of a bug, a stabilised lens would seem to be the answer to the need for a steady camera.

The truth is that there are too many variables in the equation: moving camera, moving focus, moving subject. And then you have to frame the shot properly.

The best approach is to keep the camera steady.

Chosen Few

There are some cameras that offer lens/shutter speed adjustment in macro mode.

The Canon PowerShot S5 IS has a long 12x optical zoom lens along with 8.0 million pixels of image capture.

And it has a terrific macro mode: unlike most others digicams this camera’s macro button is a separate control placed on the lens barrel and not on the mode dial. With this arrangement you can select shutter or aperture priority and macro simultaneously.

Now you can reduce the lens aperture to a minimum setting and attain the optimum depth of field when the camera is close to the subject.

Another macro-friendly model is the Canon PowerShot SX100IS. It is unusually well set up for macro shooting: with the SX100IS you can engage macro mode along with aperture priority, allowing selection of a small aperture for depth. This camera has a 10x zoom and 8.0 megapixels of image capture.

Another contender in the maxi macro stakes is the Olympus’ SP-5500UZ. There are others that have the same benefit. Aside from an extraordinary 18x optical zoom lens it has 7.1 megapixels on its CCD. When selecting macro the camera still allows you to use the zoom, so you can back off and yet still take big closeups.

In a slightly different fashion, the Ricoh Caplio R6 helps you light subjects in macro mode, an often difficult chore with the camera positioned so close to the subject. The Ricoh’s Auto Soft Flash function dampens the output of the camera’s flash. This avoids ‘washing out’ the subject at close range.

Viewing

When shooting macro with a digicam always use the LCD screen for viewing — never use the optical viewfinder. Use the optical finder and you will encounter parallax error … what you see in the finder is not what the camera will photograph.

Distortion

Digital compact camera optics are a compromise between size and price. With budget cameras you will probably encounter spherical distortion: shots taken at the wide end (even in macro!) of the zoom will barrel out at the edges; shots taken with the zoom set to tele may show distortion which forces the picture edges to bow inwards, like a pincushion.

Try shooting a square subject — like a stamp — and you’ll see what I mean. The solution is to use the Spherize filter in Photoshop to straighten the barrel distortion on the affected image.

Depth of Field

This is possibly the core factor in successful macro shooting. When you focus, the depth of field includes the plane you focus on plus an area in front of and behind that plane. Half of the sharpest area will be in front of the plane and half will be behind it.

Depth of field varies with the lens aperture, focal length and the camera-to-subject distance. Competent use of it will give you a subject in pin-sharp focus with the background in soft focus: a soft focus background isolates a subject, making it stand out sharply.

No Confusion

Take care to position your macro subject against an appropriate background: no confusing fuzz, no bright spots; dark backgrounds for light subjects and vice versa.

Lighting

You’ve probably set up the camera only centimetres from the subject. Flash is useless at a close working distance — it would overexpose the shot. If you’re working in filtered daylight (my ideal) you can help by scattering small reflectors around the subject. But in most cases you’ll have to live with the existing ambient light level.

Arguably the optimum light for macro work is to set up a scrim of translucent material (like rice paper) over the subject. In this fashion you can shoot in bright sunlight, with the subject illuminated by soft light.

Light Loss

If you’re working with a DSLR you might like to use extension tubes or close up bellows to shoot macro. If you do, you will encounter one problem: the further the lens is extended from the image sensor the more you will encounter light loss, requiring the camera to use a larger lens aperture.

Focus

In macro photography it is advantageous to have full charge over focusing — especially when you want to have control over that part of the subject you want in focus. If your camera allows manual focusing, use it and manually focus on the part of our subject that is the main point of interest.

Macro Photography Tips for Point and Shoot Digital Cameras

macro@closed up flower

macro@closed up flower

macro@closed up flower

macro@closed up flower

macro@closed up flower

Much has been written on the topic of Macro photography for those photographers fortunate enough to own a DSLR with macro lenses – but what about if you own a compact point and shoot camera? Can you get great macro shots too?

While the results achievable with a point and shoot camera in macro mode probably won’t compare with a DSLR with a purpose built macro lens I’ve still seen some remarkably good shots with compact cameras (all three shots in this post were taken with compact cameras). Here are a few tips to help you get the most out of yours:

Select Macro Mode – this is a fairly obvious first step but I’m always surprised by how many digital camera owners haven’t explored the shooting modes that their camera has. Macro mode is generally symbolized with a little flower and when selected it will tell your camera that you want to focus on a subject closer to your lens than normal (the minimum distance allowed will vary from camera to camera – consult your instruction manual to find yours). Macro mode will also usually tell your camera to choose a large aperture so that your subject is in focus but the background is not.

Use a Tripod – in macro photography a tripod can be particularly useful, even if you’re just shooting with a compact camera. Keeping your camera still not only improves your shots (getting rid of camera shake) but it allows you to play around with different settings without losing your composition.


Macro-Ladybirds
Aperture – once in macro mode some cameras will not allow you to make many other adjustments but if you are able to play with your aperture settings it can be well worthwhile to do so. As we’ve covered in our Aperture tutorials, the main thing that aperture impacts is the depth of field of your shots. Choose a small aperture (big number) if you want a large depth of field with everything in focus or a large aperture if you just want your main subject in focus. In macro photography you’ll probably want a shallow depth of field so select the largest aperture available.

Focusing – I find that in macro photography it is helpful to have full control over focusing – especially when you have shallow depth of fields where it is all the more important to make sure the right part of your shot is in focus. If your camera allows manual focusing select this option and manually focus on the part of our subject that is the main point of interest.

Composition – remember some of the basic rules of composition like the Rule of Thirds. Make sure your image has a main point of interest and place that focal point in a smart position in your image in order to draw the eye of your viewer. Try to select a non cluttered or simple background for your main subject so as it doesn’t compete with it visually.

Macro-Flower
Flash – in many macro shots having some artificial light is important. The challenge with compact cameras is that most give you limited control of your flash. As a result choosing a good time of day when there is plenty of available light is probably your best bet. If you do need more light check to see if your camera allows you to pull back the level that your flash fires at. Alternatively you might like to try diffusing it in some way (tissue paper or cellotape over the flash for example). Another option might be to use some other source of artificial light or to invest in a reflector to help make the most of available light. Experiment with different methods of lighting your subject.

Take Your Shot - once you have your shot lined up and in focus take your shot. Make sure once you’ve taken it to take a good look at it on your LCD, zooming in to make sure that your focusing is sharp. Try shooting at slightly different apertures, with different compositions and focusing on different points of your subject to see what works best.

Macro Lens Attachments – some compact cameras actually have accessories available to help with macro/close up photography. These will enable you to enlarge your subject and/or decrease your minimum focal length. These might be worth investing in if you intend on doing a lot of macro work.

Self Timer – (this point was added as a result of comments below – thanks team!) when using my DSLR for Macro work I tend to use a shutter cable release and tripod to make sure my shots are completely still (to eliminate the small amount of camera shake from pressing the shutter). Most compact cameras don’t have cable releases but a simple way around this is to use your camera’s self timer on it’s shortest time setting which will similarly mean you have no movement of your camera when taking your shot (if you’re taking notice of the ‘use a tripod’ tip above).

PS: I’ve used the term ‘macro photography fairly loosely here. Technically ‘macro photography’ is actually when you produce an image where your subject is captured on your image sensor at life size (or bigger) with a 1:1 ratio.

In the case of most (all?) compact cameras this is not achieved and in fact ‘close up’ photography would be a better description. However as most manufacturers call their close up mode ‘macro mode’ I’ve used the term for the purposes of this article.

Yellow Flower & Bee

yellow flower

flower & small bee

small bee and flower

yellow flower closed up

Robber Bee info: Pollinators such as bees won't do it for nothing, so flowers provide a rather energy-expensive 'bribe'--the nectar. Obviously the flower doesn't 'want' to hand out nectar to insects that aren't good pollinators. In theory therefore they adapt to keep out the bad pollinators, and allow the good ones in. The good ones tend to be big hairy ones--they will catch the most pollen and spread it around. It's therefore quite common to see flowers with a long narrow trumpet shape--the nectaries (the bits that secrete the nectar) are way at the bottom of that. In order to get at the nectar the bee has to struggle down and stick it's long tongue down but is forced to rub pretty hard against the stamens. If you look down the trumpet of a flower like this you should see the stamens--the bits that produce the pollen--on the top side of the flower about half way down. In order to get to the nectar a large bee has to rub past this.  Among the various different species of bee there are those that have long tongues and those with short tongues. I can't pretend to be an expert on bees at all (I only ever worked on flies), but what you seem to have on your flower is a species of bee with a short tongue but strong mouthparts. Basically it's tongue is too short to get at the nectaries via the front door (I guess it would be regarded as a 'bad pollinator--maybe it isn't very hairy or whatever, I don't know). To get to the nectar therefore it bites through the petals and can lap up the nectar. Of course this is no use for the flower because the bee doesn't do any pollination for the flower.

http://www.dl-digital.com/closeup-09-02-bee.htm

Closed Up -Water

closed up

water closed up

closed up water drops


Water as a subject is something that is almost always available to a photographer (especially if you carry a water bottle or spray bottle) and something that can make a fascinating image. We have covered the great water drop photographs of Steve Wall in the past, so we though we’d put together a collection of other photographers who manage to show what great things can be done with such a simple subject.


Wandering around Flickr can really waste a lot of hours, but when we recently stumbled accross Steve Wall‘s photostreams and specifically, his photos of water droplets, well we were impressed.
Steve is an amateur photographer who shoots on a Nikon D200, in this case with a Nikkor 60mm Macro (and like many of us, started with an old AE-1) and we’re sure you will agree that he does it damn well too! We think he combines the best of macro photography with a fantastic imagination and comes up with some spectacular images. In fact we spent quite a lot of time going through his photos!
Now, macro photos of water droplets isn’t exactly something that might have your brimming with excitement, but we thing that after you have a look at these, you might be firing up your macro lens and heading into the garden on the next dewy morning.

http://www.lightstalking.com/water-drops


Snails and Flies

 putrajaya flies

flies....putrajaya

putrajaya snails

closed up snails


Snails and Flies

One day, the sky is so Beautiful & Bright,
Beginning of a happy Spring ..

Under the cherry tree,
Looked a Small Snail crawling on the slow ..
Meanwhile, a few seconds later, a fly that flies emerge fro with the cheerful and watched the snail ..

Seeing the slow snail crawl,
The Flies says:
"Hai, Snail, where are ye?"
Calmly, he continued to crawl,
Small snail said:
"How to eat a cherry"

"Ha ha ha, Mussels Stupid ..
Where there is a cherry?
I'm from up there,
Fruit CERInya nope there "
Flies laugh at the behavior of the Small Snail ..
Said the Small Snail:
"L do not care;
When I arrived at the top,
CERInya tree must have been fruitful "

Sometimes real form does not seem clear Life Purpose ..
However, those are they that Could SUCCESS penetrate time,
Looking ahead & keep Strong,
Mobile intensely to achieve dream ..

Others may not see it,
Perhaps even scornfully, because they do not understand ..
Other people will try dropping your spirit ..

But at the moment you reach your dreams,
By the time you get cherry fruit as you want,
Then they understood that the Delusion of Your Dreams is not alone ..

Therefore, do not let anyone grab your dream before materialized ..
Beranilah Dreaming
& Stay STRONG Mobile to capitalize dream ..

(Buoys HEART Anthony Dio Martin)


Bokeh Toys Sony Photo

Snake Bokeh Toy

Team Toys Putrajaya


Crocodile Hunter

Sesumpah....eguana

Even if you're a casual photographer, you might be familiar with the term 'bokeh' — the artistic use of out-of-focus backlight to surround your subject. When done correctly, you can create a gorgeous professional image that really pops off the page (or screen). We'll show you how to customize the shape and style of your bokeh with your very own makeshift bokeh filter.
For this DIY to be useful, you'll need to already have on hand some specific equipment. Most notably a DSLR fitted with an appropriate lens for producing the bokeh effect — a 50mm lens with a low f-stop works nicely. For this tutorial we are using our own Sigma 50mm f1.4.


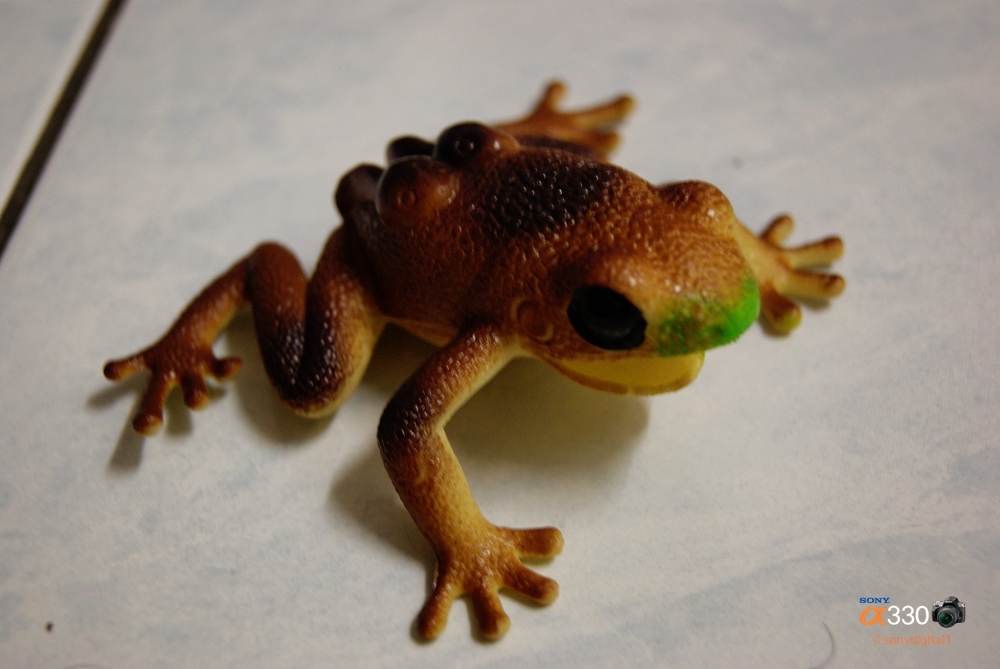
Toys Photography With Sony Alpha

Tortoise

Yellow Frog

Village Frog

Frogs Twins

Snake

Toy photography can be absolutely great fun, and is a really unique subject to capture. With creative lighting, it’s possible to capture some incredibly unique shots of toys, characters and small objects.
The main challenge of toy photography is to give your subject life – either through placing it in a life-like setting, or in an action-packed post. To give you a hand, today we’ve collected 70 beautiful examples of toy photography along with couple of tips!


Animal Geng

Spider Frog

Friesen captures the imagination of a young audience with his toy photography, while appealing to the sensibilities and pulling the heartstrings of adults who recall playing with such toys and who now have grave concerns over the future of many of the animals’ real-life counterparts.

On a lighter note, Friesen also has a vast collection of lively, vibrant and comical prints via his photo series ‘Wild Life.’ This series began as a project for his daughter’s room, and it uses the same animals (and many more) as the ones pictured in Last Migration. A personable cast of characters from lions, tigers and bears to dinosaurs, pigs and foxes leap off these prints and make bold decor statements for any room in the house.


Bokeh Flower With Sony Alpha

bokeh white flower

bokeh purple flower

bokeh kits lens

bokeh like white flower

Although difficult to quantify, some lenses enhance overall image quality by producing more subjectively pleasing out-of-focus areas. Good bokeh is especially important for large-aperture lenses, macro lenses, and long telephoto lenses because they are typically used with a shallow depth of field. Bokeh is also important for medium telephoto "portrait lenses" (typically 85–150 mm on 35 mm format) because in portraiture photography, the photographer typically seeks to obtain a shallow depth of field to achieve an out-of-focus background and make the subject stand out.
Bokeh characteristics may be quantified by examining the image's circle of confusion. In out-of-focus areas, each point of light becomes an image of the aperture, generally a more or less round disc. Depending how a lens is corrected for spherical aberration, the disc may be uniformly illuminated, brighter near the edge, or brighter near the center. Lenses that are poorly corrected for spherical aberration will show one kind of disc for out-of-focus points in front of the plane of focus, and a different kind for points behind. This may actually be desirable, as blur circles that are dimmer near the edges produce less-defined shapes which blend smoothly with the surrounding image. Lens manufacturers including Nikon, Minolta, and Sony make lenses designed with specific controls to change the rendering of the out-of-focus areas.


Red Flower And Ants

red flower

red flower bokeh

The song tells the story of a little boy who on the first day of school started drawing pictures of flowers using many different colors. The teacher tells him that he's coloring the flowers all wrong and that he should paint them red and green, "the way they always have been seen." The boy disagrees and continues to color them from his imagination until the teacher punishes him by standing him in a corner. Finally, the little boy gives in and tells the teacher that "flowers are red, and green leaves are green." When he goes to a different school, he continues mechanically painting flowers red and green, to the dismay of his new, kind teacher.


red flower with red ants

wow red ants....group

The bodies of fire ants, like all insects' bodies, are divided into three sections: the head, the thorax, and the abdomen, with three pairs of legs and a pair of antennae. Fire ants can be distinguished from other ants by their copper brown head and body with a darker abdomen. The worker ants are blackish to reddish, and their size varies from 2 mm to 6 mm (0.12 in to 0.24 in). These different sizes of the ants can all be present in the same nest.
Solenopsis spp. ants can be identified by three body features—a pedicel with two nodes, an unarmed propodeum, and antennae with 10 segments and a two-segmented club.
Many ants bite, and can cause irritation by injecting formic acid; stinging ants have a dedicated venom-injecting sting as well as mandibles.


Good/Bad Bokeh with sony digital

bokeh

bokeh1

bokeh try...75-300mm

bokeh simple

like bokeh


This, like art itself, is very relative to taste. Some people might consider Good Bokeh bad, and Bad Bokeh good. The background of the picture above of the flower might look nice to some, but ugly to others. In reality I do not know of, and doubt the existence, of a standard for depicting the quality of  Bokeh. Bokeh is like air, it is what it is, and you either like it or not (I hope you like air for your own sake). So you are the one that determines the worth of Bokeh, but only for yourself. I love the image of the flower above because of the HUGE contrast there is between the in-focus flower, and the completely burred background. Yet the smooth texture of the flower blends in quite a lot with the smooth background.

Spiced Fried Chicken - Sony Digital


spiced Fried Chicken

Closed up

Fried Chicken Closed up
What I used to make this dish:-
4 chicken drumsticks/pieces
3 dashes of garlic powder
2 dashes of onion powder
1 teaspoon of ginger powder
1/2 teaspoon cumin powder
1 teaspoon cumin seeds
1/2 teaspoon coriander powder
1 tablespoon turmeric powder
1/2 teaspoon Madras curry powder
2 dashes of chilli powder
1/2 teaspoon salt
1 tablespoon sugar
1 egg
2 tablespoons cornstarch flour
Canola Oil for deep frying
Steps:-
1. Mix all the above ingredients including the chicken drumsticks in a big bowl.
2. Mix well and leave the bowl covered in the refrigerator for at least an hour or overnight if you can. (Disclaimer: The recipe owner prefers to leave her marinated meat overnight so that the meat can absorb more of the wonderful flavours from the marinate.)
3. Heat the oil and deep fry the marinated drumsticks for 20 minutes or until golden brown. Make sure you flip the drumsticks from time to time.
4. Drain the chicken on kitchen paper towels. Voila!
5. Enjoy your Ayam Goreng Berempah!
Money RM10 - Closed Up


Rice Closed UP


LinkWithin

Related Posts Plugin for WordPress, Blogger...